At a glance
- Dental implants rely on osseointegration, a direct structural and functional connection between living bone and the surface of a load-bearing titanium or zirconia fixture.
- The primary biological cause of late implant loss is peri-implantitis, a destructive inflammatory condition initiated by anaerobic plaque biofilms that colonise the submucosal implant surface.
- A healthy implant remains entirely immobile and asymptomatic under functional loading.
- Comprehensive diagnostic assessment requires a systematic combination of clinical probing, mobility testing, and advanced radiographic imaging.
- When an implant must be removed, the primary surgical objective is extracting the fixture while causing minimal trauma to the residual alveolar housing.
Understanding Dental Implant Failure and Jawbone Anatomy
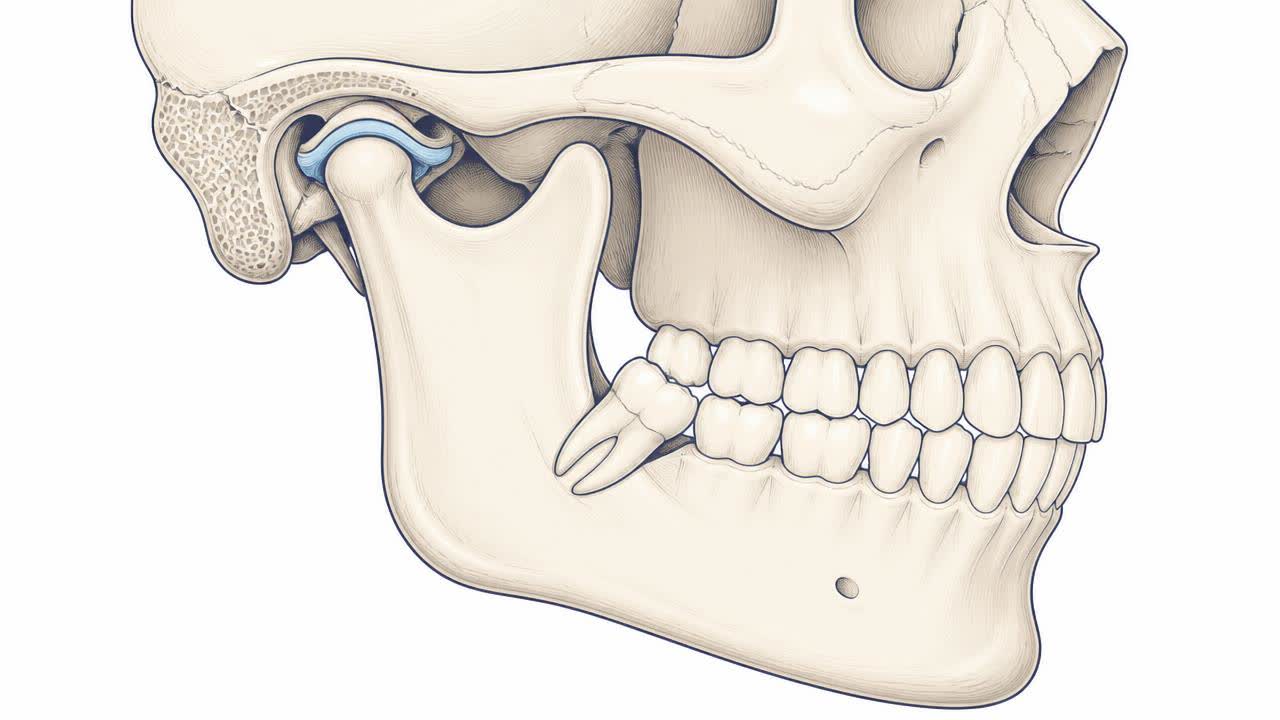
Dental implants rely on osseointegration, a direct structural and functional connection between living bone and the surface of a load-bearing titanium or zirconia fixture. The jawbone comprises an outer layer of dense cortical bone and an inner core of porous trabecular bone. In the upper jaw (maxilla), the bone is generally softer and closely borders the maxillary sinus, whereas the lower jaw (mandible) is denser but houses the inferior alveolar nerve within the mandibular canal. When osseointegration fails, the rigid biological interface breaks down, leading to fibrous encapsulation, persistent inflammation, or progressive marginal bone loss around the fixture.
Implant failure is clinically categorised into early and late failures. Early failure occurs prior to prosthetic loading, typically caused by impaired surgical healing, bacterial contamination, poor primary stability, or thermal injury to the osteotomy site during drilling. Late failure arises after the implant has been restored and subjected to functional mastication, predominantly driven by progressive peri-implantitis or biomechanical overloading. When conservative treatments cannot halt destruction or when an implant loses mechanical stability, failed dental implant removal becomes necessary to prevent catastrophic destruction of the surrounding skeletal architecture.
A critically compromised implant left in situ acts as a chronic bacterial nidus. As peri-implant infection advances, it destroys the alveolar ridge horizontally and vertically, threatening adjacent teeth, jeopardising anatomical structures such as the mental foramen or incisive canal, and eroding the foundational bone needed for future revision. Understanding the three-dimensional anatomy of the residual ridge is essential prior to surgical explantation, ensuring that removal techniques preserve the maximum volume of healthy host bone.
When to Seek Urgent Assessment (Red Flags)
Following implant removal or during the course of implant deterioration, certain acute clinical presentations demand immediate evaluation by an oral and maxillofacial surgeon or implant specialist. Rapidly expanding facial swelling that extends toward the floor of the mouth, submandibular space, or periorbital tissues indicates a spreading fascial space infection. Accompanied by difficulty swallowing (dysphagia), shortness of breath (dyspnoea), or trismus (inability to open the jaw), this represents a life-threatening airway emergency requiring urgent hospitalisation.
Other critical red flags include sudden high fever, systemic rigors, persistent active haemorrhage from the surgical site that fails to subside with direct pressure, and newly developing numbness or tingling in the lower lip, chin, or tongue. Similarly, if an existing implant abruptly becomes visibly mobile, begins shedding bone particles, or discharges abundant frank pus, immediate clinical assessment is mandatory to arrest infection and prevent irreparable damage to the supporting jawbone.
Clinical Signs and Symptoms of a Failing Implant
A healthy implant remains entirely immobile and asymptomatic under functional loading. The pathognomonic hallmark of complete osseointegration loss is clinical mobility of the fixture itself, distinct from the looseness of an overlying abutment screw or crown. In early stages of failure, patients may notice mild tenderness on chewing, a dull ache within the supporting jawbone, or persistent hyperaesthesia in surrounding gingival tissues. Any perceptible rotation or axial movement confirms the total absence of rigid bone anchorage.
Active peri-implant infections produce clear localised soft-tissue signs. Patients frequently report spontaneous mucosal bleeding, recurrent swelling, and a persistent foul taste or malodour stemming from purulent discharge (suppuration) around the implant collar. The overlying peri-implant mucosa often appears erythematous, oedematous, and hyperplastic, with progressive gingival recession exposing the dark, threaded titanium collar. In cases where the implant borders the maxillary sinus, failed fixtures can trigger chronic odontogenic maxillary sinusitis characterised by unilateral nasal congestion and facial fullness.
Diagnostic Evaluation and Staging of Peri-Implant Defects
Comprehensive diagnostic assessment requires a systematic combination of clinical probing, mobility testing, and advanced radiographic imaging. A flexible plastic or titanium periodontal probe is used to measure peri-implant probing depths; readings exceeding 6 millimetres, accompanied by bleeding on probing or suppuration, indicate active pathological pocketing. Clinicians also assess the presence and width of attached keratinised tissue and distinguish true fixture mobility from component loosening by removing the prosthetic crown to test the underlying implant directly.
Radiographic assessment begins with standardised intraoral periapical radiographs to track marginal bone levels relative to the implant threads. When failed dental implant removal is anticipated, high-resolution Cone Beam Computed Tomography (CBCT) is mandatory. CBCT delivers three-dimensional cross-sectional imaging to assess the full volumetric morphology of the peri-implant osseous defect, identifying fenestrations, dehiscences, and the proximity of the fixture apex to critical neurovascular structures such as the inferior alveolar canal and the maxillary sinus floor.
According to the 2017 World Workshop Classification by the European Federation of Periodontology (EFP) and the American Academy of Periodontology (AAP), peri-implantitis is defined by mucosal inflammation, progressive bone loss beyond initial physiological remodelling, and increased probing depths. Bone defects are clinically categorised into circumferential (well-contained, crater-like intrabony lesions), dehiscence (loss of the facial or lingual plate), and horizontal patterns (generalised crestal height reduction), which dictate the complexity of explantation and subsequent revision grafting.
Methods of Failed Dental Implant Removal: Trephine vs Conservative Techniques
When an implant must be removed, the primary surgical objective is extracting the fixture while causing minimal trauma to the residual alveolar housing. Conservative explantation relies on mechanical reverse torque extraction systems. A dedicated retrieval tool engages the internal threads or connection of the implant, applying high counter-torque (often exceeding 150 to 200 Ncm) in an anticlockwise direction. This controlled shearing force fractures the micro-interlocking bone-to-metal interface without removing neighbouring host bone, making it the preferred first-line approach whenever feasible.
Trephine bur removal is reserved for fractured fixtures, stripped internal connections, or integrated implants where excessive reverse torque risks mandibular fracture. A trephine is a hollow, cylindrical surgical drill designed to core out a narrow ring of bone immediately surrounding the implant body. While highly predictable and efficient, trephines inevitably remove a cylindrical collar of viable host bone, expanding the bony defect. Sizing must be selected with extreme precision; a trephine whose inner diameter matches the outer implant diameter by less than 0.5 millimetres is vital to limit peripheral bone loss.
Alternative advanced modalities include piezosurgery and narrow surgical burs. Piezoelectric surgical tips utilize ultrasonic micro-vibrations to precisely cut mineralised bone while sparing adjacent soft tissues, nerves, and sinus membranes. Piezosurgery allows the surgeon to perform selective, ultra-fine osteotomies down the long axis of the implant, preserving bone volume far better than rotary trephines. Clinicians carefully weigh these techniques against defect geometry, remaining bone volume, and the patient's anatomical risks.
Step-by-Step Surgical Trephine Removal and Site Revision
The surgical procedure begins with profound local anaesthesia, often supplemented by conscious sedation for anxious patients. The surgeon elevates a full-thickness mucoperiosteal flap using precise sulcular and releasing incisions, exposing the marginal bone and the entire contaminated implant circumference. All granulation tissue and inflammatory debris filling the osseous defect are meticulously removed with titanium or carbon-fibre curettes, fully revealing the remaining bone-to-implant contact and the precise orientation of the fixture.
The surgeon selects a calibrated, sterile trephine drill corresponding to the exact outer diameter of the implant. Operating under continuous, copious irrigation with chilled sterile saline to prevent thermal necrosis (bone heating above 47 degrees Celsius), the trephine is advanced along the long axis of the implant at low rotational speeds. The osteotomy is extended apically to approximately two-thirds of the integrated depth, after which gentle mechanical elevation or extraction forceps are applied to deliver the loosened fixture without fracturing the remaining apical bone.
Following explantation, the osteotomy socket is thoroughly debrided, decorticated to induce bleeding and osteoprogenitor cell influx, and chemically disinfected. Site revision then proceeds via guided bone regeneration (GBR). The defect is densely packed with a particulate bone graft—such as an autograft, allograft, or xenograft—and sealed with a resorbable collagen barrier membrane pinned with fixation tacks. Finally, tension-free periosteal releasing incisions are performed to achieve complete, tension-free primary closure with non-resorbable monofilament sutures.
Potential Surgical Complications and Management
Surgical explantation entails inherent risks that require rigorous surgical planning and swift intraoperative management. Neurological injury is a major concern when removing mandibular implants positioned near the inferior alveolar or mental nerves. Trephine drilling beyond the apex can cause neurapraxia, axonotmesis, or neurotmesis, resulting in temporary or permanent numbness, paresthesia, or dysesthesia of the lower lip and chin. Using high-resolution CBCT planning, surgical drill stops, and conservative piezoelectric techniques substantially mitigates this risk.
In the posterior maxilla, explantation carries the risk of sinus membrane perforation or accidental displacement of the fixture into the maxillary antrum. If a sinus communication occurs, the surgeon must evaluate the Schneiderian membrane, repair small tears with collagen membranes, or perform a formal Caldwell-Luc procedure if fixture retrieval from the sinus cavity is necessary. Postoperatively, patients require systemic decongestants, antibiotics, and strict sinus precautions (avoiding nose blowing and open-mouth sneezing) to facilitate uneventful healing.
Other significant complications include severe alveolar bone fracture, secondary surgical site infection, and failure of the revision bone graft. If guided bone regeneration fails due to premature membrane exposure or bacterial contamination, the infected graft material must be debrided immediately to prevent extensive osteomyelitis. Systemic antimicrobial therapy, targeted antiseptic lavages, and an extended healing interval of four to six months are implemented before considering further reconstructive procedures.
Protocol for Secondary Implant Placement and Prevention
Secondary implant placement following failed dental implant removal requires meticulous clinical judgement regarding timing. Immediate reimplantation (placing a wider fixture directly into the explantation socket) is strictly limited to cases with zero active infection, intact circumferential bone walls, and robust primary stability. In the vast majority of peri-implantitis failures, a delayed staged approach is necessary. The socket undergoes thorough debridement and guided bone regeneration, followed by a maturation period of 4 to 9 months to establish mature, vascularised host bone.
Long-term prevention of recurrent peri-implant disease requires stringent maintenance and lifestyle modifications. Patients must maintain exemplary personal oral hygiene using specialised interdental brushes, soft-filament manual or sonic brushes, and water flossers. Individuals with systemic conditions like diabetes must maintain tight glycaemic control (monitoring HbA1c levels), while complete cessation of smoking, betel nut, and paan consumption is imperative to maintain local microvascular perfusion and tissue health.
A regular supportive peri-implant maintenance programme is critical. Professional reviews every 3 to 6 months should incorporate annual radiographic monitoring, gentle mucosal probing, subgingival biofilm debridement using glycine powder air-polishing or non-metallic curettes, and occlusal checks. Early detection of peri-implant mucositis—the reversible precursor to peri-implantitis—ensures prompt non-surgical intervention, preventing bone loss and eliminating the future need for complex revision surgeries.
Evidence and further reading
Mainstream clinical consensus across international oral and maxillofacial surgery and periodontology underscores that the early removal of irreversibly compromised dental implants is critical to preserve alveolar bone housing for future reconstruction. Guidelines established by the European Federation of Periodontology (EFP), the American Academy of Periodontology (AAP), and the International Team for Implantology (ITI) agree that implants displaying progressive, uncontrolled bone loss exceeding 50% of the fixture length or showing clinical mobility should be explanted without delay.
Systematic reviews in leading peer-reviewed literature, including the *Journal of Clinical Periodontology*, the *International Journal of Oral and Maxillofacial Surgery*, and the *Cochrane Database of Systematic Reviews*, confirm that reverse torque extraction is the least traumatic method of explantation. However, when reverse torque is contraindicated due to fixture fracture or internal stripping, calibrated trephine osteotomy combined with guided bone regeneration provides highly predictable outcomes for subsequent site rehabilitation. Long-term studies consistently emphasise that patient compliance with supportive maintenance programmes and systemic risk factor control are the defining determinants of secondary implant success.
Causes and Risk Factors for Implant Failure
The primary biological cause of late implant loss is peri-implantitis, a destructive inflammatory condition initiated by anaerobic plaque biofilms that colonise the submucosal implant surface. Biofilm dysbiosis triggers a sustained host immune response characterised by elevated pro-inflammatory cytokines, matrix metalloproteinases, and osteoclast activation, causing rapid bone resorption. Biomechanical factors also play a major role; eccentric occlusal forces, severe bruxism, improper implant angulation, and poorly fitted superstructures can induce microfractures in the bone-implant interface, accelerating structural failure or titanium fracture.
Patient-specific systemic risk factors significantly influence the longevity of osseointegration. Uncontrolled diabetes mellitus impairs microvascular circulation, suppresses neutrophil chemotaxis, and delays wound healing, markedly elevating failure rates. Heavy tobacco use induces peripheral vasoconstriction and suppresses cellular immune responses. In South Asian populations, the habitual chewing of betel quid, paan, and gutka exposes the peri-implant mucosa to potent chemical irritants, arecoline, and abrasive particles, which exacerbate mucosal inflammation, promote tissue fibrosis, and accelerate peri-implant bone destruction.
Local anatomical and surgical variables also contribute to failure. Inadequate dimensions of keratinised mucosa around the implant neck leave the peri-implant seal vulnerable to mechanical trauma during brushing and facilitate bacterial invasion. Furthermore, previous head and neck radiotherapy, long-term intravenous bisphosphonate therapy for skeletal conditions, untreated chronic periodontitis, and poor compliance with supportive maintenance protocols represent profound hazards that compromise long-term implant survival.
Postoperative Recovery, Bone Healing, and Aftercare
Recovery following trephine explantation and bone grafting mirrors a complex oral surgical procedure. Over the initial 48 to 72 hours, patients should expect moderate swelling, bruising, and manageable discomfort, which typically peak on day three before gradually subsiding. Analgesics such as ibuprofen and paracetamol, combined with short courses of therapeutic antibiotics and a 0.12% chlorhexidine gluconate mouthwash, form the standard pharmacological regimen. Cold compresses applied externally to the cheek help limit soft-tissue oedema during the acute phase.
Strict adherence to postoperative instructions is vital to protect the grafted site. Patients must consume a soft, cool diet, avoid chewing directly over the surgical quadrant, and refrain from strenuous physical exertion for at least one week. Brushing the surgical area directly is prohibited during initial healing; instead, plaque control relies on gentle antiseptic rinsing. Smoking, tobacco chewing, and the use of straws must be strictly avoided, as negative intraoral pressure and chemical toxins disrupt delicate fibrin clot formation and compromise graft integration.
Normal healing displays progressive soft-tissue wound maturation with intact sutures and decreasing tenderness. Conversely, abnormal recovery is characterised by worsening throbbing pain refractory to prescribed analgesia, visible dehiscence of the surgical flap, persistent active bleeding, displacement or shedding of bone graft granules into the oral cavity, or foul-smelling purulent exudate. Suture removal and clinical evaluation generally take place 10 to 14 days postoperatively.
Questions patients ask us
- Why does a dental implant fail after many years of successful function?
- Late implant failure is most commonly caused by peri-implantitis, a chronic bacterial infection that causes progressive bone loss around the fixture. Other factors include heavy occlusal forces from bruxism (teeth grinding), mechanical component fracture, uncontrolled systemic conditions like diabetes, and lifestyle habits such as smoking or tobacco chewing, which weaken bone health and immune response over time.
- What is the difference between reverse torque removal and trephine removal?
- Reverse torque removal uses a specialised retrieval tool to back the implant out anticlockwise, unscrewing it without cutting surrounding bone. Trephine removal uses a hollow circular drill to cut a thin core of bone surrounding the fixture. Trephines are reserved for fractured implants or stripped connections where reverse torque is impossible.
- Is the failed dental implant removal procedure painful?
- The procedure is performed under profound local anaesthesia, often supplemented by conscious sedation, ensuring you feel no sharp pain during surgery. You will only feel mild pressure and vibration. Postoperative soreness and swelling are typical for several days but are well managed with standard prescribed painkillers, cold packs, and anti-inflammatory medications.
- How long do I have to wait before placing a new implant after explantation?
- In most cases, secondary implant placement requires a healing period of 4 to 9 months following explantation and guided bone regeneration. This delay allows the socket to clear residual infection and allows the newly placed bone graft to fully vascularise, mature, and create a solid biological foundation for the new fixture.
- What are the primary risks associated with trephine implant removal?
- The primary risks include temporary or permanent nerve damage (causing numbness in the lower lip or chin), perforation into the maxillary sinus, loss of peripheral alveolar bone, and local wound infection. These complications are minimised by using high-resolution 3D CBCT scans, precision-sized trephines, and experienced surgical technique.
- Can a loose dental implant tighten up on its own with antibiotics?
- No. True implant mobility indicates that the biological osseointegration between the titanium fixture and the jawbone has completely broken down. Antibiotics cannot regenerate lost bone-to-implant contact. Once an implant is physically mobile, it cannot re-integrate and must be surgically removed to prevent severe, irreversible bone loss.
- How does chewing paan or gutka affect dental implant survival?
- Chewing paan, gutka, or betel quid severely compromises peri-implant tissues. The chemical toxins, arecoline, and abrasive particles induce chronic mucosal inflammation, restrict microvascular blood flow to the bone, accelerate bacterial colonization, and impair wound healing, substantially increasing the rates of peri-implantitis, bone resorption, and implant failure.
- What symptoms indicate that my dental implant is failing?
- Key warning signs include noticeable movement of the implant, persistent pain or tenderness when chewing, redness and swelling in the surrounding gum, spontaneous bleeding, foul taste from pus discharge, or visible recession exposing the metallic threads of the implant. Any of these signs warrant prompt clinical examination.
Sources and further reading
Guidance from professional and public health bodies. Clinical decisions here are made on your own examination and radiographs.
- 1.Clinical parameters of care and patient information — American Association of Oral and Maxillofacial Surgeons
- 2.Guidance on the extraction of wisdom teeth — NICE (UK)
- 3.Oral cancer — risk factors, early detection and prevention — World Health Organization
- 4.Policy statements and oral health definitions — FDI World Dental Federation
- 5.Dental health — conditions, treatments and patient guidance — NHS (UK)
- 6.Systematic reviews of oral and dental interventions — Cochrane Oral Health
- 7.Regulatory framework and dental education standards in India — Dental Council of India
When to see us
Get examined without waiting if any of the following applies to you:
- Swelling that spreads, restricts mouth opening or affects swallowing or breathing
- Numbness, altered sensation, or bleeding that will not stop after surgery
- Jaw locking, an ulcer or lump lasting more than two weeks, or a white or red patch that does not heal
Get a written plan and cost before you commit
If this is what you are dealing with, the next step is a consultation with radiographs — surgery & jaw cases are seen by the specialist who handles that field. You get a written plan and staged cost before anything begins.
reception@dramitsharmahospital.comThis article is general education and does not replace an in-person examination, radiographs or a diagnosis by a qualified dentist.
Clinical terms in this article
Related in Surgery & Jaw
Wisdom Tooth Problems: Symptoms, Impaction and When Removal Is Needed
Why wisdom teeth cause pain and swelling, what impaction means, and how to decide between monitoring and surgical removal.
Wisdom Teeth and Impactions
When third molars need removal, what impaction means, and what recovery realistically looks like.
Jaw Surgery, TMJ Disorders and Facial Trauma
Corrective jaw surgery, temporomandibular joint pain and management of facial injuries by a maxillofacial team.
Laser Periodontal Therapy Procedure Benefits and Recovery
Laser periodontal therapy, including the LANAP protocol, uses targeted wavelength lasers to treat moderate-to-severe periodontitis. This guide covers biological mechanisms, procedural stages, recovery guidelines, evidence-based outcomes, and long-term periodontal maintenance strategies.
Connective Tissue Graft Surgery for Receding Gums
Connective tissue gum graft surgery repairs severe gingival recession by transplanting donor tissue beneath receded gums. This evidence-based guide explains surgical techniques, anatomical principles, recovery timelines, clinical classifications, risks, and postoperative maintenance for optimal root coverage.
Free Gingival Graft Procedure to Thicken Gums
A free gingival graft is a proven periodontal surgical procedure designed to augment thin or deficient attached gum tissue. This comprehensive guide covers anatomical indications, surgical steps, donor and recipient healing phases, complications, and evidence-based post-operative recovery protocols.