At a glance
- A diagnostic mockup, also termed an intraoral aesthetic preview, is a temporary, non-invasive procedure in which a clinician transfers a planned dental design directly onto a patient's un-prepared teeth using provisional…
- The need for a diagnostic mockup arises from diverse aetiologies that compromise dental harmony, structural integrity, and oral function.
- Constructing a reliable diagnostic trial smile demands a rigorous pre-clinical assessment.
- Diagnostic mockups are broadly classified based on the fabrication method and clinical workflow used to produce them.
- A foundational principle of contemporary restorative dentistry is the preservation of sound tooth structure, underpinned by minimally invasive protocols.
Anatomy, Mechanics, and Definition of the Diagnostic Mockup
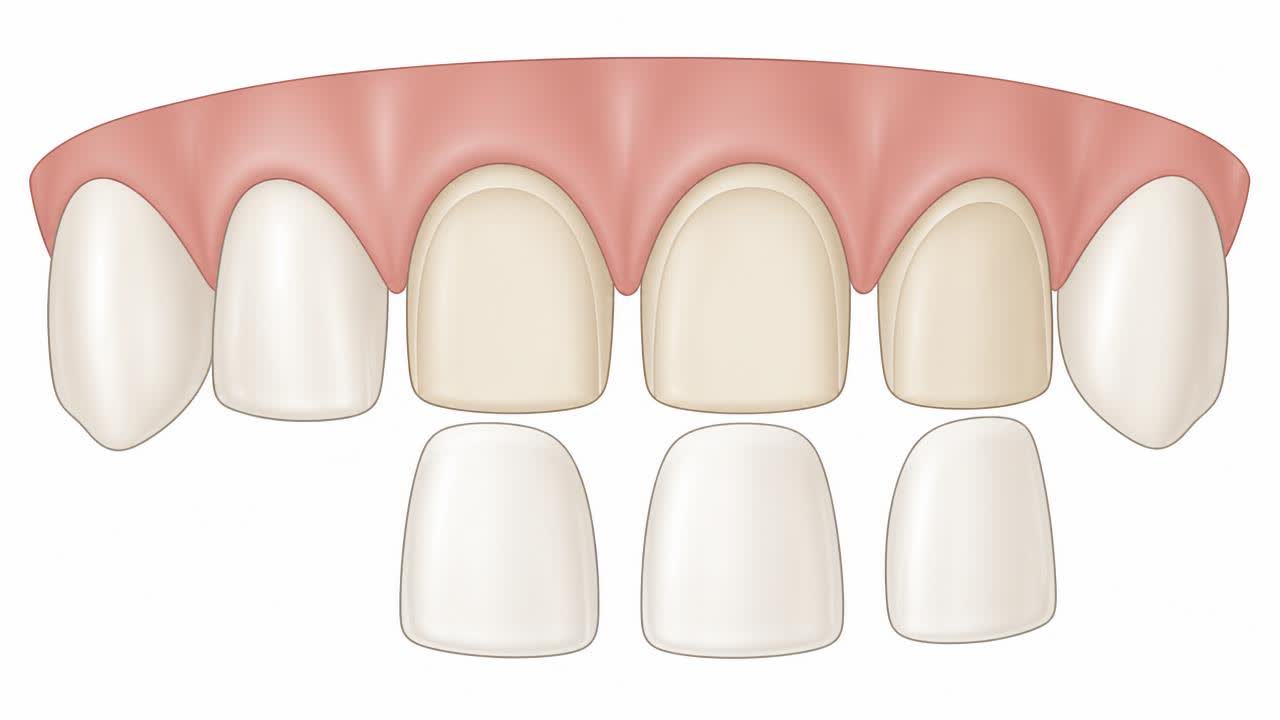
A diagnostic mockup, also termed an intraoral aesthetic preview, is a temporary, non-invasive procedure in which a clinician transfers a planned dental design directly onto a patient's un-prepared teeth using provisional composite or bis-acryl resin. This technique allows both the patient and the dental team to assess three-dimensional tooth morphology (shape and contour), incisal edge position (the biting edge of the front teeth), and facial proportions before executing any irreversible tooth preparation. The anatomical framework involved spans beyond the hard dental tissues—enamel, dentine, and the underlying pulp chamber—to include the periodontium (the supporting gums and alveolar bone), the dynamic musculature of the upper and lower lips, and the temporomandibular joints (TMJs).
The biomechanical foundation of a dental trial smile mockup relies on the principles of the smile arc, buccal corridor width, and the occlusal plane. The smile arc describes the relationship between the curvature of the incisal edges of the maxillary (upper) teeth and the curvature of the lower lip during a natural, unforced smile. Buccal corridors represent the dark bilateral spaces between the outer surfaces of the posterior teeth and the corners of the mouth. By layering temporary resin over existing structures, the clinician physically evaluates whether widening these corridors, lengthening worn teeth, or altering gingival zenith levels (the highest point of the gum line around each tooth) harmonises with the patient's unique facial dynamics.
From an anatomical perspective, the trial smile does not simply test aesthetics; it evaluates the envelope of function. This envelope is the three-dimensional boundary path dictated by the lower jaw during speech and chewing. Placing a mockup allows the dentist to confirm that increasing tooth volume or changing anterior guidance (how the front teeth slide against each other) does not induce occlusal trauma, muscle hyperactivity in the masseter and temporalis muscles, or pathological strain on the temporomandibular joint complex.
Diagnostic Assessment: Clinical Photography, 3D Scans, and Occlusal Analysis
Constructing a reliable diagnostic trial smile demands a rigorous pre-clinical assessment. The diagnostic protocol begins with standard extraoral and intraoral clinical photography and dynamic videography. Videography is especially critical because static photographs often fail to capture natural lip mobility during spontaneous speech and laughter. Clinicians document resting lip posture to measure resting incisal display (how much upper tooth is visible when the mouth is relaxed), high smile line display (the extent of gum visibility), and the alignment of the dental midline with the facial midline (specifically referencing the philtrum and interpupillary line).
Digital workflows have transformed this initial diagnostic phase. Intraoral optical scanners generate high-resolution digital surface models (stereolithography or STL files) of the maxillary and mandibular arches. These digital impressions eliminate the dimensional distortions inherent in conventional elastomeric materials. Where deep structural pathology, advanced wear, or skeletal disharmony is present, clinicians may incorporate digital volume tomography, such as cone-beam computed tomography (CBCT), to evaluate remaining alveolar bone height, root angulation, and the proximity of the biological width (the soft tissue attachment above the bone).
Functional diagnostic records require facebow registration or digital jaw tracking to record the relationship of the maxilla to the hinge axis of the TMJ. Diagnostic study casts are then mounted on a semi-adjustable or fully adjustable digital articulator in centric relation (a reproducible, physiologically neutral joint position). This step ensures that any proposed aesthetic modification respects the neuromuscular and joint constraints of the patient before the dental laboratory fabricates the physical or virtual diagnostic wax-up.
Clinical Indications: Aetiology of Aesthetic and Functional Deficits
The need for a diagnostic mockup arises from diverse aetiologies that compromise dental harmony, structural integrity, and oral function. Pathological tooth wear is a primary indication and is categorised into attrition (wear from mechanical tooth-to-tooth friction), erosion (chemical dissolution from intrinsic gastric acids or dietary acids), and abrasion (wear from foreign bodies, such as abrasive tooth powders or aggressive brushing). In specific regional populations, cultural habits such as the chronic chewing of areca nut, paan, or tobacco preparations accelerate severe occlusal and incisal attrition, resulting in collapsed vertical dimension of occlusion (the height of the bite) and loss of anterior tooth display.
Developmental and genetic anomalies frequently necessitate a dental trial smile mockup. Conditions such as microdontia (abnormally small teeth, frequently manifesting as 'peg-shaped' lateral incisors), severe enamel hypoplasia, and endemic dental fluorosis cause significant aesthetic disfigurement, irregular spacing, and compromised enamel architecture. Patients who have undergone orthodontic therapy often present with residual black triangles (gingival embrasures where gum tissue has receded) or tooth-size discrepancies (Bolton index discrepancies), which require additive restorative solutions that must be verified using a physical trial before permanent bonding.
Additionally, traumatic injuries resulting in fractured coronal tooth structure, age-related incisal wear, and failing historic restorations with poor aesthetics or broken margins warrant diagnostic mockups. In complex rehabilitations involving multiple indirect restorations—such as ceramic veneers, onlays, or full-coverage crowns—the mockup serves as an indispensable blueprint to establish whether the proposed vertical and horizontal changes are biologically and structurally tolerable.
Classification and Techniques: Direct, Indirect, and Digital Modalities
Diagnostic mockups are broadly classified based on the fabrication method and clinical workflow used to produce them. The primary modalities are direct intraoral freehand mockups, indirect analogue wax-up mockups, and digital CAD/CAM (computer-aided design and computer-aided manufacturing) mockups. The direct freehand technique involves the clinician sculpting composite resin directly onto unetched, unbonded teeth during a single clinical session. While fast and requiring no laboratory fees, this method is operator-dependent and limited to simple, localised modifications of one or two teeth.
The indirect analogue method remains a widely respected standard in comprehensive smile design. The dental technician adds physical carving wax onto articulated stone casts (a diagnostic wax-up) to reconstruct ideal tooth morphology and occlusal planes. A flexible silicone matrix or palatal putty index is formed over this wax-up. At the subsequent appointment, the dentist fills this index with a temporary auto-curing bis-acryl resin material and seats it over the patient's teeth. After polymerisation, the matrix is removed, leaving a faithful physical replica of the planned restorations mechanically locked over the natural dentition.
The digital CAD/CAM workflow translates this process into virtual space. Using digital smile design software, the clinician or technician creates a digital diagnostic wax-up overlaid onto 2D and 3D facial scans. This virtual design is either 3D-printed as a monolithic resin shell or milled as a diagnostic prototype. Alternatively, a 3D-printed model of the planned outcome is produced, from which a thermoformed or silicone matrix is made for chairside bis-acryl application. This digital approach guarantees exact reproducibility between the trial smile and final restorations.
Comparative Restorative Approaches: Additive versus Subtractive Planning
A foundational principle of contemporary restorative dentistry is the preservation of sound tooth structure, underpinned by minimally invasive protocols. The dental trial smile mockup is essential for distinguishing between additive and subtractive smile design strategies. In pure additive cases—such as correcting peg laterals, closing diastemas (gaps), or restoring eroded teeth with a collapsed bite—the restorations are placed within new spatial volumes. The mockup demonstrates that aesthetic and functional goals can be achieved with zero or negligible enamel reduction, thereby preserving the critical enamel-dentine junction.
Conversely, in cases presenting with severe dental crowding, labial tipping (protruding front teeth), or super-erupted teeth (teeth that have drifted downward due to missing opposing teeth), the proposed smile design cannot be purely additive. Attempting an additive-only approach in these scenarios results in over-contoured, bulky teeth that irritate the gingival tissues and cause lip incompetence. The mockup visually highlights areas where tooth structure protrudes through the planned restoration contour, demonstrating to both patient and clinician that orthodontic realignment or selective enamel reduction (subtractive preparation) is mandatory prior to restoration.
Furthermore, using depth-limiting diamond burs directly through the intraoral mockup—a technique known as preparation through the mockup (APT)—ensures that tooth reduction is dictated solely by the final desired position rather than the existing malposition. Clinical evidence demonstrates that this technique prevents overt preparation and guarantees that the majority of the final veneer or crown margins remain safely anchored in hard enamel rather than softer, less predictable dentine.
Step-by-Step Clinical Protocol of the Trial Smile Appointment
The clinical appointment for a dental trial smile mockup follows a precise, sequential protocol designed to ensure patient comfort, structural stability, and diagnostic accuracy. Because the procedure is completely non-invasive and reversible, no local anaesthetic is administered; maintaining natural lip and facial muscle sensation is vital for evaluating phonetics and dynamic smile lines. The clinician begins by thoroughly polishing the teeth with a non-fluoridated pumice paste to remove plaque, pellicle, and surface debris that could interfere with the accurate seating of the transfer matrix.
Next, the silicone or thermoformed matrix—fabricated from the diagnostic wax-up—is loaded with a bis-acryl composite provisional material. Bis-acryl is preferred over traditional polymethyl methacrylate (PMMA) due to its minimal volumetric shrinkage during setting, lack of free monomer irritation to gingival tissues, and low exothermic reaction (it produces virtually no heat during polymerisation). The loaded matrix is firmly seated over the maxillary arch, and excess unset material is carefully wiped away from the gingival margins. The material undergoes a semi-rigid gel phase within 45 to 60 seconds, followed by full setting within two to three minutes.
Once fully cured, the matrix is gently peeled away. The clinician uses fine carbide burs, curettes, and interproximal abrasive strips to carefully trim any remaining resin flash from the gingival sulcus and interdental spaces. The mockup is not chemically bonded to the teeth; it stays in place primarily through mechanical engagement with interproximal undercuts and physical adaptation to the tooth contours. The trial smile is then lightly polished to provide a smooth, lifelike surface texture for dynamic clinical evaluation.
Evaluating Aesthetics, Phonetics, and the Envelope of Function
With the mockup in place, the evaluation begins by assessing dynamic facial aesthetics. The clinician and patient review the smile at conversational distance in a mirror and on video playback. Key parameters include horizontal symmetry, midline alignment, tooth proportions (specifically the width-to-length ratio of the central incisors, which ideally falls between 75% and 85%), and whether the incisal curvature follows the natural curve of the lower lip. The patient is asked to smile spontaneously to verify that the gum display remains within an acceptable range, avoiding an excessive 'gummy' appearance.
Phonetic assessment is an indispensable functional check. The patient is asked to pronounce specific phonetic sounds that test incisal edge position. 'F' and 'V' sounds (fricatives) are evaluated by checking that the incisal edges of the upper central incisors lightly touch the wet-dry line (vermilion border) of the lower lip without catching or stumbling. 'S' and 'Z' sounds (sibilants) are tested to assess the closest speaking space—the clearance between the upper and lower teeth during rapid speech. If the trial smile makes the teeth too long or the lingual contours too thick, the patient will exhibit a lisp or clicking sounds as teeth collide.
Finally, the occlusal envelope of function is analysed using articulating paper (pressure-marking film). The clinician checks static contacts in centric occlusion (the primary resting bite) and dynamic contacts during lateral excursions (sliding the jaw side to side) and protrusion (sliding the jaw forward). Canine guidance or mutually protected occlusion must be verified to confirm that posterior teeth disengage smoothly when moving the jaw, preventing harmful transverse forces on anterior restorations.
Complications, Limitations, and Managing Discrepancies
While the trial smile is fundamentally diagnostic and temporary, clinicians must manage certain technical and clinical challenges. The most common physical limitation is bis-acryl fracture, particularly at thin incisal margins or across wide diastema closures. Because the mockup is unbonded, thin sections can chip during heavy mastication or interproximal flossing. Patients are instructed to avoid biting into hard or sticky foods if the mockup is worn home for an extended multi-day assessment. If a fracture occurs, it is readily repaired chairside with flowable composite resin.
Soft tissue irritation and gingival inflammation can occur if excess resin flash is left protruding into the gingival crevice. If plaque accumulates around roughly finished margins, localised marginal gingivitis develops rapidly. Thorough debridement and meticulous polishing of all subgingival margins prevent this complication. Another subjective challenge is aesthetic mismatch or patient dysmorphia, where the sudden visual change in tooth shape or length induces psychological discomfort. In these instances, the clinician systematically adjusts the resin intraorally—shortening incisal edges, rounding sharp line angles, or narrowing embrasures—until the patient is fully satisfied.
Limitations in extreme skeletal discrepancies (such as severe Class II overjet or Class III underbite) must be acknowledged. A dental trial smile mockup cannot compensate for deep basal bone discrepancies. If a patient requires combined orthognathic surgery or comprehensive orthodontics, placing an additive resin mockup on malpositioned teeth will merely create an overcontoured, functionally unstable prototype, highlighting the absolute necessity of multidisciplinary treatment planning.
Evidence and further reading
Mainstream clinical guidelines and peer-reviewed dental literature strongly endorse the diagnostic trial smile as an essential risk-reduction step in complex restorative dentistry. Systematic reviews in the Journal of Prosthetic Dentistry, the Journal of Esthetic and Restorative Dentistry, and the International Journal of Prosthodontics emphasise that pre-operative intraoral mockups significantly reduce patient dissatisfaction and minimise biological tooth reduction. Professional bodies, including the European Federation of Periodontology (EFP) and the American Academy of Cosmetic Dentistry (AACD), advocate for the preservation of enamel margins, which is directly facilitated by preparation-through-mockup protocols.
Furthermore, established evidence indicates that evaluating phonetics, incisal guidance, and soft tissue integration in a provisional, reversible state drastically diminishes the incidence of post-cementation technical failures, such as porcelain chipping and joint dysfunction. Clinicians and patients are encouraged to review evidence-based resources from the British Dental Association (BDA), FDI World Dental Federation, and Cochrane Oral Health Group when considering comprehensive restorative and aesthetic oral rehabilitations.
Contraindications, Biomechanical Red Flags, and Urgent Considerations
A diagnostic mockup must never be placed across actively diseased oral tissues. Absolute biological contraindications include untreated active periodontal disease with deep bleeding pockets, untreated carious lesions (cavities), and periapical pathology (abscesses or bone infection at the root tips). Applying resin over active caries or unstable periodontal structures can accelerate microbial proliferation and compromise pulpal or periodontal vitality. These active diseases must be thoroughly resolved before initiating aesthetic or elective restorative planning.
Biomechanical red flags include untreated severe bruxism (nocturnal tooth grinding) with unchecked heavy bite forces, unresolved temporomandibular joint internal derangements (such as painful joint locking, severe arthritic crepitus, or acute masticatory muscle spasm), and extreme mobility of anchor teeth. Attempting to lock a rigid bis-acryl matrix over severely mobile teeth risks unintentional extraction or trauma upon removal of the matrix. Clinicians must also identify true acrylic or bis-acryl resin allergies, though these remain exceedingly rare.
Urgent care is warranted if a patient wearing an extended trial mockup experiences sudden, severe dental pain, throbbing that interrupts sleep (indicative of acute pulpitis from underlying unaddressed disease), or an unexpected inability to close their back teeth together. If the temporary resin matrix dislodges unevenly and causes severe occlusal interference or creates an acute choking hazard due to a loose fragment, the patient must contact their dental clinic immediately for professional removal.
Questions patients ask us
- What is a dental trial smile mockup?
- A dental trial smile mockup is a non-invasive, reversible clinical procedure where temporary tooth-coloured resin is placed over your natural teeth. It allows you and your dentist to see and test the planned shape, length, and appearance of your new smile directly in your mouth before any permanent changes or drilling are carried out.
- Is the mockup procedure painful or does it require local anaesthetic?
- The procedure is completely pain-free and does not require local anaesthetic. Because your natural teeth are neither drilled nor chemically altered during this stage, you will not feel any nerve discomfort. Keeping your mouth naturally un-numbed is actually essential so you can speak normally to test your speech and facial expressions.
- How long does a trial smile mockup stay on my teeth?
- Typically, a trial smile is evaluated during a single clinical appointment lasting 45 to 90 minutes and is removed before you leave. In select complex rehabilitations, a dentist may bond a temporary trial mockup with minimal spot-etching for 24 to 48 hours so you can evaluate function, speech, and aesthetics at home.
- Can I eat and drink normally with a trial smile in place?
- If you are wearing an extended trial smile home, you should consume only soft foods and avoid hard, sticky, or chewy items. The temporary resin is held primarily by mechanical friction and can chip under heavy chewing pressure. You should also avoid heavily pigmented drinks, like black coffee, red wine, and turmeric-rich foods, to prevent resin staining.
- What happens if I do not like the look of the trial smile?
- Disliking aspects of the trial smile is a valuable diagnostic outcome. Because the resin is temporary, your dentist can immediately modify the shape, shorten or lengthen teeth, and smooth angles using handpieces chairside. If major alterations are required, new records are taken without having damaged your underlying natural teeth.
- Can a mockup fix severe tooth wear caused by paan or grinding?
- A mockup cannot independently repair damage, but it is the critical planning tool used to design your rehabilitation. If your teeth are worn down from grinding or chewing paan, the trial mockup establishes how much height must be restored to rebuild your bite safely before veneers, onlays, or crowns are manufactured.
- How does the trial smile help prevent over-drilling of teeth?
- Dentists use a technique called 'preparation through the mockup'. By drilling through the temporary resin prototype rather than directly on your natural tooth, the clinician removes only the exact microscopic amount of enamel needed to accommodate the final porcelain, preserving maximum healthy, natural tooth structure.
- What are the red flags to watch for during a trial smile evaluation?
- Contact your dental clinic immediately if you experience sharp or throbbing tooth pain, bleeding gums, jaw joint pain, or if a piece of the temporary resin breaks off and creates a sharp edge or choking hazard. You should also reach out if your back teeth fail to meet comfortably when chewing.
Sources and further reading
Guidance from professional and public health bodies. Clinical decisions here are made on your own examination and radiographs.
- 1.Whitening, bonding and veneers — patient information — American Dental Association
- 2.Guidance on tooth whitening and cosmetic dental treatment — British Dental Association
- 3.Oral health — fact sheet and global status report — World Health Organization
- 4.Policy statements and oral health definitions — FDI World Dental Federation
- 5.Dental health — conditions, treatments and patient guidance — NHS (UK)
- 6.Systematic reviews of oral and dental interventions — Cochrane Oral Health
- 7.Regulatory framework and dental education standards in India — Dental Council of India
When to see us
Get examined without waiting if any of the following applies to you:
- Sensitivity or pain that continues for more than a few days after cosmetic work
- A veneer, crown or bonded restoration that has chipped, debonded or feels high in the bite
- Gum inflammation or dark margins developing at the edge of a restoration
Get a written plan and cost before you commit
If this is what you are dealing with, the next step is a consultation with radiographs — cosmetic & smile design cases are seen by the specialist who handles that field. You get a written plan and staged cost before anything begins.
reception@dramitsharmahospital.comThis article is general education and does not replace an in-person examination, radiographs or a diagnosis by a qualified dentist.
Clinical terms in this article
Related in Cosmetic & Smile Design
Dental Crowns and Bridges: What They Are and When You Need One
How crowns and bridges restore damaged or missing teeth, the materials used, and what the process and aftercare involve.
Teeth Whitening and Tooth Stains: Causes and Treatment Options
Why teeth discolour over time, the difference between surface stains and deeper discolouration, and how professional whitening compares with home options.
Smile Makeover and Digital Smile Design
How veneers, bonding, whitening and gum contouring are combined into one planned cosmetic outcome.
Teeth Whitening: What Actually Works
In-office versus home whitening, realistic expectations, sensitivity management and what whitening cannot fix.
Black Triangles Between Teeth Causes and Treatment
Open gingival embrasures, commonly called black triangles between teeth and gums, occur when the interdental papilla recedes. Explore the anatomical causes, clinical classifications, restorative and orthodontic treatments, and long-term periodontal maintenance strategies.
Internal Tooth Bleaching for Discolored Nonvital Teeth
Internal tooth bleaching after root canal treatment is a conservative endodontic procedure that lightens intrinsically discoloured, non-vital teeth from within the pulp chamber, restoring natural aesthetics without requiring extensive structural removal for crowns or veneers.